TimeMap Quick Start tutorial

Contents
The TimeMap Quick Start tutorial will help you gain a high-level understanding of the software and how to create a timeline. You can quickly create a draft timeline to learn how the features work. We suggest charting your family's birthdays to get started. You can also experiment with Example Visuals, which are accessible from the Getting Started pane.
The TimeMap Quick Start tutorial is designed to help you:
| • | Learn about TimeMap's primary features. |
| • | Gain an introduction to the tools and features you need to create a timeline and start working in it. |
| • | Practice using the features in the Example Visuals provided in TimeMap. |
| • | Direct you to the help topics and procedures you need to accomplish initial tasks and learn more about TimeMap. |
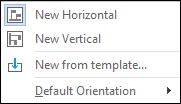
You can also click New on the Getting Started pane and then select whether you want the Default Horizontal or Vertical timeline.
The blank timeline template is now ready for you to begin working. For more information, see About timelines and Creating and saving timelines. |
Fact Boxes are flags that denote events and connect to the time scale. Text boxes are for titles, labels, and legends. As you add fact boxes to your timeline, TimeMap automatically generates the time scale for you. The time scale is the timeline at the bottom of the visual. Each time you add a new fact box, the New Fact dialog box displays for you to type in the date and fact text. This dialog box is also where you can customize the fact box's font style, color, and line style. You can also modify the layout of a fact box, and modify image settings or linking files.
Add fact boxes in two views:
Enter facts in either Timeline or Spreadsheet View and TimeMap automatically creates a time scale and puts fact boxes above the corresponding fact dates. Change a fact date or add a new fact and TimeMap automatically recalculates the time scale for you. For more information, see Adding fact boxes and Entering dates and times. New facts display with the default style for the template you are using (the top style that displays in the Add New Facts pane in the Fact Design Gallery). You can apply a new style to a new fact box or a set of selected fact boxes. You can apply new fact box styles in either view. See About customizing timeline elements and Using the Fact Design Gallery. In Timeline view, you can drag timeline elements to fine-tune their position. See Moving timeline elements. |
In addition to fact boxes or pictures, text boxes are another element you can add to your timeline. Text boxes can be added to the timeline any where you want to include additional information, emphasize key points, or add a timeline key. Text boxes differ from fact boxes because they do not contain dates and do not connect to or affect the timescale. They also do not have border or fill by default, but you can add these style changes if you want. For more information, see Adding text boxes. |
The time scale is the timeline located at the bottom of the visual. The time scale can be moved to another location in the timeline or customized by inserting time scale breaks to condense gaps in the timeline. You can also customize the width and height, begin and end dates, the font and date formats, style and color. For more information, see Inserting time scale breaks and Moving the time scale as well as other topics in the Customizing the Time Scale book. |
Customize facts in either Timeline or Spreadsheet view. Customize any timeline element by double-clicking on it. You can select multiple fact or text boxes at one time and edit style changes all at once. For more information, see About customizing timeline elements and Using the Fact Design Gallery. Explore topics in both the Customizing Timelines and Customizing the TimeScale books. |
Printing your TimeMap timeline requires no more than clicking the Print button on the Quick Access toolbar or choosing one of the Print options on the File menu. TimeMap uses your page setup options to determine the paper size, orientation, and margins to use when printing. You can also add page numbers and date and time information to your visual by changing the layout properties within the Page Setup dialog box. For more information, see About printing timelines, Printing a multi-page timeline banner, Printing and saving timelines to PDF. You can also save timelines as image files, templates, or to make charts. See Saving timelines as image files and Saving timelines to make charts. Once timelines are created, you can easily export the data by emailing timelines or sending it to another program like Microsoft PowerPoint, Sanction, PowerPoint, or CaseMap. For more information on each, see the respective topics in the Exporting Data book. |