The Fact Design Gallery consists of three panes that help you add or customize fact boxes using a variety of pre-designed styles. The Fact Design Gallery displays to the left of the timeline window and defaults to the Add New Facts pane, which displays fact box styles available for the template you currently have open.
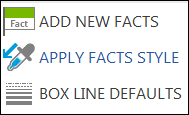
The Fact Design Gallery includes three design tools:
| • | Add New Facts displays fact box styles from the current, open template. |
| • | Apply Fact Styles allows you to apply a selected styles to one or more fact boxes in the timeline. |
| • | Box Line Defaults allows you to change the line and flag line styles for new fact boxes. |
The Add New Facts pane displays fact box styles for the open template. The top fact box style is the default style. New fact boxes created in either the Timeline or Spreadsheet views use the default style. Custom styles that are not a default template style display under the Custom in this Visual heading. If you open a timeline created in an earlier version of TimeMap, those styles display under the heading. If you edit a fact box in this timeline, the new style displays here too.
| 1. | In the Add New Facts pane, click on the fact box you want to use. |

| 2. | In the New Fact Box, type in the fact date and time, and the fact text. |
| 3. | Click OK to add the new fact box to the timeline. |
For more information, see Adding fact boxes.
|
| 1. | Click on the fact box(es) you want to edit. |
| • | Press the Shift key while clicking on fact boxes. |
| • | Or draw a line or a box over fact boxes you want to select. |
First click in a blank area of the timeline, then press and hold the left mouse key while dragging it through the fact boxes you want to select.
|
| • | Press the Shift key while clicking on a consecutive range of facts. |
| • | Press the Ctrl key while clicking on facts separated by different spreadsheet rows. |
|
| 2. | In the Fact Design Gallery pane, click the Apply Fact Styles bar. |
| 3. | In the Apply Fact Styles list, click the style you want to apply. |

| 4. | In the Confirm dialog box, click Yes or No to Apply this style to the selected fact boxes? |
The selected fact boxes immediately display with the new style format.
|
Changing the box line styles only affects new fact boxes added to a timeline. If you want to change an existing fact box, you will need to edit it. The line style is the line extending from the fact box to the time scale. The flag line style is the end point of the line where it meets the time scale.
| 1. | In the Fact Design Gallery, click the Box Line Defaults bar. |

| 2. | In the Line Style list, click on the line style you want to use. |
| 3. | In the Flag Line Style list, click on the flag line style you want to use. |
| 4. | Click on the Add New Facts bar. |
| 5. | Click on the fact box style you want and type in the date/time and fact text, then click OK. |
The new line styles display for the new fact box.
|


