Creating and saving timelines

Each time you start TimeMap, the Getting Started pane displays. From this pane you can access a variety of example visuals and can create an unlimited number of timelines.


ac_tip_icon

You can create a new timeline from an existing timeline. Open the timeline you want to copy. On the File menu, click Save As. Type in a new timeline name and then click Save. See also Creating templates.


hmtoggle_plus1To identify timeline files

Timeline files are identified by the paper and clock icon when saved in folders on your desktop or network.

TM_timemap_file_icon

hmtoggle_plus1To create and save a new timeline
1.On the Getting Started pane, click New Visual.
2.On the New Visual submenu, click New Horizontal or New Vertical.

tm_new_menu_zoom25

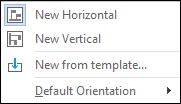
You can also click New on the Getting Started pane and then select whether you want the Default Horizontal or Vertical timeline.

The blank timeline template is now ready for you to begin working.

3.Add timeline elements, such as fact and text boxes, to your timeline.
4.On the File menu, click Save As and then click Save As Visual to save your new timeline.
5.In the Save As dialog box, navigate to the folder where you want to save your timeline files.
6.In the File Name field, type in a name for the new template, then click Save.
hmtoggle_plus1To close a timeline

On the File menu, click Close.


related_topics_buttonRelated Topics


Need additional help? Email the CaseMap Support team at: casemap.support@lexisnexis.com, or contact a support representative at 800.543.6862 (Option 2, then Option 4). The CaseMap Support team is available between the hours of 9:00 a.m. to 7:00 p.m. Eastern Time, Monday - Friday.

Copyright © 2018 LexisNexis. All rights reserved.