As you add fact boxes to your timeline, TimeMap automatically generates the time scale for you. The time scale displays at the bottom of your timeline visual.
Each time you add a new fact box, the New Fact dialog box displays for you to type in the date and fact text. This dialog box is also where you can customize the fact box's font style, color, and line style. You can also modify the layout of a fact box, and modify image settings or linking files. See About customizing timeline elements.
Add fact boxes in two views:
| • | Timeline View allows you to see the fact boxes as you add them to the timeline (default view). |
| • | Spreadsheet View allows you to add facts into spreadsheet fields; one fact box per spreadsheet row. |
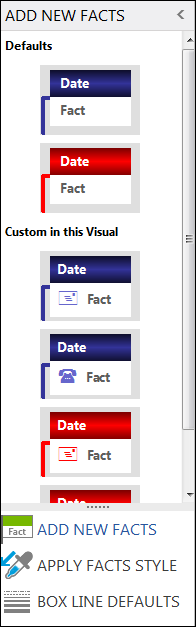
New facts display with the default style for the template you are using (the top style that displays in the Add New Facts pane in the Fact Design Gallery). You can apply a new style to a new fact box or a set of selected fact boxes. You can apply new fact box styles in either view. See About customizing timeline elements and Using the Fact Design Gallery.
| 1. | On the Home ribbon, click Fact Box. |

Or
| 2. | Click on a fact box in the Add New Facts pane that displays to the left of the timeline. |
You can also click the Insert key, or right-click in the timeline and click New Fact Box. See To add new facts from the gallery.
| 3. | Right-click in the blank space in the Add New Facts pane to Create a New Default Style. |
| 4. | Click on the fact box style you want to use. |
The New Fact Box dialog box displays.

| 5. | In the Fact tab's Date & Time field, type in the date and time for the fact. |
| 6. | In the text box, type in the fact text. |
| 7. | On the Fact tab's toolbar, select the font style and size you want to use. |
| 8. | Click the Bold, Italicize, or Underscore buttons to use for any selected fact text. |
| 9. | Click the Highlight Color button to select a highlight color for any fact text. |
| 10. | Click the Font Color button to select the text color. |
| 11. | Click the Left, Center, or Right buttons to adjust text alignment within the fact box. |
| 12. | Click OK to add the fact box to the timeline. |
|
| 1. | In the timeline window, click the Spreadsheet View tab and then click Click here to add a new fact. |

| 2. | In the Date & Time field, type in the date and time for the fact. |
| 4. | In the Fact Text field, type in the fact text. |
| 5. | Press the Insert key to add a new fact and save the previous fact box text. |
| 6. | Continue adding facts until you are finished. |
| 7. | Press Tab to save the last fact text entry. |
| 8. | Click the Timeline View tab to view all your new fact boxes in the timeline. |
|
| 1. | Right-click the fact box or fact row and click Delete. |
You can click on the fact box and then click the Delete button.
| 2. | In the message to delete the fact, click Yes. |
|