The transcript word index is a listing of all words in a transcript. Single transcript and multiple transcript reports both offer case index reports. The Case Index report includes a cover sheet for the transcript(s). You have the option to include a title page, statement of confidentiality, and introduction. You also have the option to have TextMap exclude the redacted words in the transcript when printing the case index reports.
The font size and column settings can be customized in the Page Setup dialog box. See Changing page setup options.


|
If you print the transcript with a case index to a PDF file, each word's page and line reference in the index is a hyperlink to the page in the transcript where the word appears. TextMap also creates bookmarks in the PDF for the contents of the report or ReportBook and for the entire case index.
|
| 1. | In the Transcripts pane, click on the transcript for which you want to print an index. |
| 2. | On the Reports ribbon, under Current Transcript Report, click Word Index. |
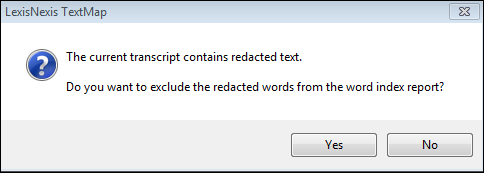
| 3. | Click Yes or No to exclude or include redacted text in the current transcript. |
| 4. | In the Print dialog box, select your print options, then click OK. |
The print options will change depending on your selection. See Selecting print output options.
|
We recommend you select Preview first to verify your report before printing a hard copy or saving the report as a PDF file. You can select your print options from the Print Preview toolbar.
|
|
| 1. | On the Reports ribbon, in the Multiple Transcripts Report area, click Word Index. |
| 2. | On the Word Index ReportBook Wizard's Welcome page, click Next. |
| 3. | On the Select Transcripts page, review the transcripts you want to include in the report. |
Click Modify to change the order of the transcripts in the Select Transcripts dialog box or add more transcripts to the report.
| 4. | On the Select Transcripts page, click Next. |
| 5. | On the Options page, select or clear the ReportBook options you want to include. |

See Modifying ReportBook title pages.
| 7. | On the Options page, click Next. |
| 11. | On the Include Redactions page, choose one of the following: |
| • | Yes, to exclude redacted words. |
| • | No, to include redacted words. |
| 8. | On the Completing the Word Index ReportBook Wizard page, click Finish to generate the report. |
| 9. | In the Print dialog box, under Destination, click the print output you want. |
The print options will change depending on your selection. See Selecting print output options.

|
We recommend you select Preview first to verify your report before printing a hard copy or saving the report as a PDF file. You can select your print options from the Print Preview toolbar.
|
| 8. | Select additional print options, then click OK. |
|