Annotation Tools

You can access annotation tools in the exhibit window via the IMAGE TOOLS tab, and from the Presentation window via the Annotation Tools Gallery button.


imagetoolstab_zoom50

In the main program window, annotation tools are available in the IMAGE TOOLS tab


presentationwindowtools_imagegalleryhighlighted

in the Presentation window, annotation tools are available via the Annotation Tools Gallery button


ac_caution_icon

During a presentation, annotations made in the exhibit viewer of the main program window can be made to be immediately visible in the Presentation window. Conversely, annotations made in the Presentation window can be made to be immediately visible in the exhibit viewer. However, for this reciprocity to work consistently, the annotation layer to which the annotation was applied must be configured to be visible in both the exhibit viewer and the Presentation window. For more information about annotation layers, see: Annotation Layers.


hmtoggle_plus1List of annotation tools

Annotation tools are available in the main window and in the presentation window. For a list of the Keyboard shortcuts for annotation tools, see: Keyboard Shortcuts. The function of each annotation tool is described here:

Tool

Description

Select

Selects annotations that have been added to the exhibit.

Allows you to resize, reposition, and delete annotations.

Crop/Zoom

Zooms in on a rectangular area of the exhibit.

Use this tool to draw attention to a part of the exhibit or in conjunction with the Screen Capture tool to create a screen capture. For more information on screen captures, see: Screen Captures.

Tear Out

Creates floating zoom areas that can be resized, repositioned, or closed as needed. Tear outs contains whatever annotations that were applied to the exhibit as well as any that are created as the tear out is open.

Dragging the mouse across the face of a tear out creates a highlighted area on the exhibit.

The edge of tear outs can be set to smooth or to a ripped effect.

For more information see: Tear Out Tool.

Magnifier

Creates a rectangular magnified area that can be moved around.

Pan

Moves the exhibit around in the exhibit window.

Erase

Erases annotations, one at a time.

Highlight

Creates a translucent highlighted rectangle. The default highlight color is yellow but it can be changed by selecting a different color from the Fill Color control.

Arrow

Creates an arrow.

Line

Creates a line.

Pen

Creates a freehand line.

Rectangle

Creates an unfilled rectangle.

Ellipse

Creates an unfilled ellipse.

Redaction

Creates a filled rectangle.

Text

Allows you to type text onto the exhibit. The text box is bordered and can be moved or resized. You can also set the default font and font style. To access font settings, on the FILE menu, click Options, and then click Exhibits.

Note that this tool is available in the main program window only.

Line size and Line color

Sets the line weight and color for arrows, lines, pens, rectangles, and ellipses.

Fill color

Sets the fill color for the highlight, rectangle, and ellipse.

Sets the background color for text.

Layers

Provides control over the visibility of annotations. For more information, see: Annotation Layers.

hmtoggle_plus1To annotate an exhibit from the IMAGE TOOLS tab
1.On the HOME tab, click the Exhibits taskbar.
2.Select the exhibit you want to annotate.
3.Do one of the following:
Double-click the exhibit.
Select the IMAGE TOOLS tab.
4.Annotate the exhibit by using the tools in the image toolbar.


hmtoggle_plus1To annotate an exhibit from within the presentation window
1.In the presentation window, open the exhibit you want to annotate.
2.Select the annotation tool gallery button.

presentationwindowtools_imagegalleryhighlighted

3.Select an annotation tool and then apply the annotation to the exhibit.
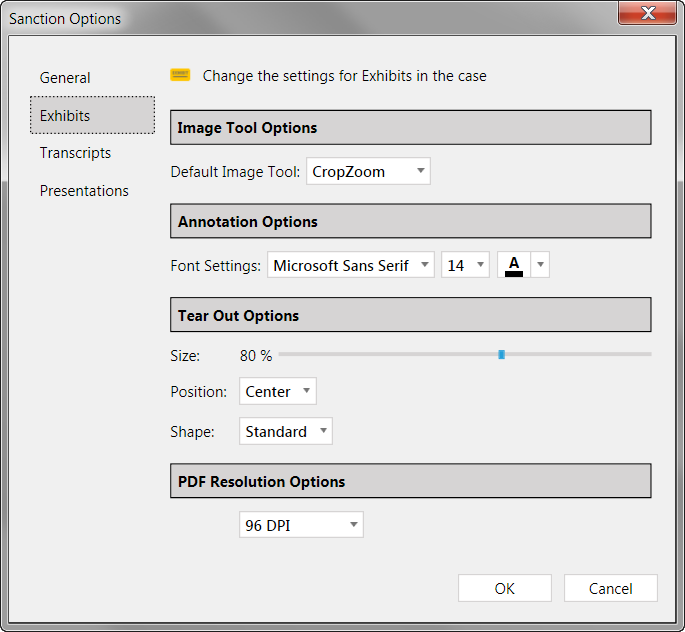
 

hmtoggle_plus1To set defaults for annotation tools
1.On the FILE tab, click Options.
2.Click Exhibits.

sanctionoptionsexhibitsa_zoom50

File > Options > Exhibits


3.Select options for annotation tools needed.

Tool

Options

Image Tool

Select the default image tool as: Highlight, Arrow, Line, Pen, Rectangle, Ellipse, Crop/Zoom, or Tear Out.

Annotation Font

Change the default font, font size, and color of text annotations.

Tear Out

Change the default screen position of tear outs.

Change the default edge of the tear out from standard (smooth) to a ripped edge.

PDF Resolution

Increase the resolution of PDF pages. The default value is 96 DPI, with stops at 150, 200, and 300.

4. Click OK.


ac_note_icon

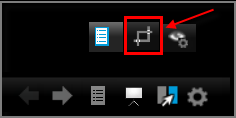
You can also access Sanction options from the presentation window. In the presentations window, select the presentation options button.

presentationwindowoptonsbuttona

hmtoggle_plus1To delete all annotations

You can delete all the annotations applied to exhibit pages in one operation. When you delete multiple annotations in this way, you can choose whether to include or exclude exhibit stamps in the delete operation.

Select the exhibit or exhibit pages that you want to remove annotations from.

1.Do either of the following:
Right-click the selected exhibit or exhibit pages and then click Delete Exhibit Page Annotations.
Click the IMAGE TOOLS tab, and then click Delete Annotations.
2.Click one of the following, depending on what you want to do:

Select this option:

To accomplish this:

Delete All Exhibit Page Annotations

Delete all annotations, including any exhibit stamps.

Delete All Excluding Stamps

Delete all exhibits, but keep exhibit stamps.

Delete Only Stamps

Delete all exhibit stamps, but keep all other annotations.

3.In the confirmation box, click Yes.

The annotations and/or stamps are deleted.


related_topics_buttonRelated Topics

Need additional help? Email Sanction support at: casemap.support@lexisnexis.com, or call 800.833.3346 (option 3). Support is available Monday - Friday from 9:00 a.m. to 7:00 p.m. Eastern Time.

© 2018 LexisNexis. All rights reserved.