About annotations

Contents
After transcripts have been imported into TextMap, they are ready to be analyzed and annotated. During this process, you will select phrases, sentences and paragraphs, and comment on them. You will also use TextMap to categorize text selections and attach files.
Any note that you can put on a sticky note, you can create in TextMap. Add annotation notes to explain why a section is important, mark a section to research further, or flag a certain section as important to build or refute your case. You can create a list of claims and arguments related to a case and then categorize notes related to the issues. You can also import an issues list that you created in CaseMap or import a list of opposing designations.
In TextMap, all issues are initially set to the default color yellow. You can assign each issue a color so that it can be easily identified when scrolling through the transcript. For instance, you could color code all research items red to be easily recognizable. See About case issues and Creating case issues.
Annotations that overlap each other will display colored bars to the left of a transcript. Each color represents the issue color designated for the annotation and shows where each annotation begins and ends.

Annotations also display in the Annotations pane where they can be sorted and filtered. You can also view annotations in the Annotation Detail pane. See Viewing annotations and Filtering annotations.
TextMap offers three annotation modes to help you simplify the annotation process, depending on how you want to work. Each time you open a case in TextMap, the TextMap Default Annotation Mode dialog box displays, unless you select the Don't show again check box. You can change annotation modes at any time by clicking the Annotation menu and then clicking the desired mode. You can also click on the Annotations button on the Text & Video Tools Options ribbon or use the right-click menu. Manual Mode is the default annotation mode.
Annotation modes include:aw
To quickly determine what mode you are using, you can look at your mouse pointer indicator as you annotate text.
Annotation mode indicators include:
|

When printing reports, the annotation will reference the line(s) where the partial annotation is created in the transcript. You also have the option to highlight the entire line in reports. Click Print, and then click Page Setup. Click the Annotations tab and in the Highlighting area, select the check box. This allows you to highlight the entire line when creating and printing annotation reports.
|
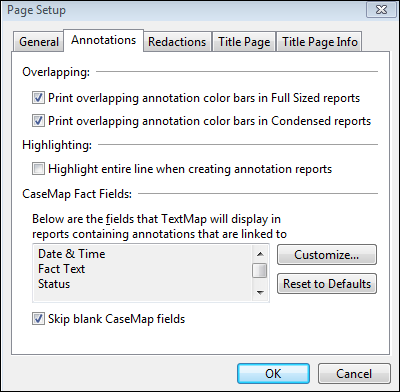
Overlapping annotations bars print in full-size and condensed reports, single or multiple transcripts. In full-size reports, colored annotation bars display to the left of the transcript text up to one quarter of an inch or approximately six bars deep. The overlapping annotation feature is turned on by default but can be turned off from the File menu by clicking Print, and then click Page Setup. Click the Annotations tab and clear the overlapping check boxes.
|
