Importing Media and Clip Lists

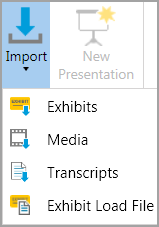
To import media, you use the Media Import Wizard. This is available from FILE > Info > Import and from the HOME > Import.

hmtoggle_plus1To import media
1.With a case open, do one of the following:
On the FILE tab, click Info, click Import, and then click Media.
On the HOME tab, click Import. and then click Media.

ImportOptionsA

The Media File Import Wizard starts.

mediaimportwizard1_zoom50

2.Click Next.

The Select Files to Import dialog box opens.

mediaimportwizard2_zoom50

3.Click Add Files or Add Folder, depending on whether you want to select files individually or by the folder.

Option

Perform these steps

Add files individually

1.Click Add Files.
2.Browse to the folder that has files you want to add.
3.Select one or more files, and then click Open.

Add a folder with or without its subfolders

1.Click Add Folder.
2.Browse to the folder that has files you want to add.
3.Click Select Folder.
4.Add more items or remove items from the list as needed. When your list contains all the files you want to import, click Next.

The Select Import Destination Folder dialog box opens.

mediaimportwizard3_zoom50

5.Select a destination folder and then click Next. If necessary, you can click New Folder and then create a new folder as a destination for the import.

The Ready to Import dialog box opens.

mediaimportwizard4_zoom50

6.Review the summary of your import selections. If the file list and destination folder are all right, then click Next.

The import proceeds. When completed, the Import Confirmation dialog opens. It provides a count of the number of transcripts that were imported. Any error that occurred during import is noted on the Import Confirmation screen.

mediaimportwizard5_zoom50

7.Click Close.

The files are added to the case in the folder you selected.

hmtoggle_plus1To create a clip list

A clip list is a text file that contains a list of the clips that you want to create from a transcript. If you need to create many individual clips from the same synchronized transcript, creating a clip list can save significant time over typing each clip into the Quick Clip individually. You can import a clip list for any synchronized transcript. 

You create the clip list using a plain text editor, such as Notepad. Using the text editor, you designate clips by entering starting and ending points of clips using one of the following formats:  

Pg.Ln+Pg.Ln

Pg:Ln+Pn:Ln

Pg.Ln-Pg.Ln

Pg:Ln-Pg:Ln

For example, the following clips list would create 2 individual clips: 

4:14-4:17

5:2-6:20

The first clip would start on page 4, line 14 and end on page 4, line 17. The second clip would start on page 5, line 2, and end on page 6, line 20.

After you have created the clip list file, you can use Sanction to import the file, and your clips will be created.


hmtoggle_plus1To import a clip list
1.On the Home tab, click the Transcripts navigation bar.
2.Click the synchronized transcript that you want to import clips for. 
3.On the HOME tab, click Clip List.

The Welcome to the Clip List Import Wizard dialog box opens.

4.Click Next.

The Select Clip List File to Import dialog box opens.

5.Click Add File.
6.Navigate to the clip list file, select it, and then click Open.

The clips are listed in the Select Clip List to Import dialog box.

7.Click Next.

The Import Confirmation dialog box opens.  

8.Click Close.
related_topics_buttonRelated Topics

Need additional help? Email the Sanction Support team at: casemap.support@lexisnexis.com, or contact a support representative at 877.301.0344. The Sanction Support team is available between the hours of 9:00 a.m. to 9:00 p.m. Eastern Time, Monday - Friday.

Copyright © 2015 LexisNexis. All rights reserved.