When reviewing documents in DocManager, you can create a new fact or research extract record from an annotation using the Send to CaseMap tool. The annotated text and any notes applied to the annotation will display in the Fact Text field on the Facts spreadsheet, or in the Extract Text field in the Extracts from Authorities and Authorities and Extracts research spreadsheets.
The document is linked to the case record and the page number for the annotation location displays in the Source(s) field of the Facts spreadsheet, or the Linked File field for research spreadsheets. When you click on the paperclip icon for the document record, it displays in DocManager on the page where the annotation text is located.
If you want to view or modify record detail for the document you are reviewing, you can access the record detail dialog box directly from DocManager by clicking Record Detail button.
| 1. | Open a document in DocManager and click Annotate Text. |
| 2. | Drag your mouse pointer over the text you want to annotate to open the New Annotation dialog box. |

The text you selected displays in the Document Text box.
| 3. | In the Note tab area, type in information you want. |
| 4. | Click the Create New Fact button to open the Send to CaseMap - New Fact dialog box. |
Notice that the excerpt you highlighted in the document now displays in the Text Selection field and is enclosed in brackets.


|
Do not delete the brackets from text excerpts imported using the Send to CaseMap utility. Brackets prevent CaseMap's recognition of short names and designate actual document text for the import.
|
| 8. | In the Date & Time field, type in the date of the fact. |
| 9. | In the Fact Text field, type in a short description of the fact, using short names to link the fact automatically to people entered in the Persons spreadsheet. |
This text description will display in the Fact Text field in the Facts spreadsheet.
| 10. | Select the Key check box, if this fact record is important to the case. |
| 11. | In the Status field, select whether the fact is disputed or not. |
| 12. | In the Linked Issues field, type in the short name for any issues you want to link to this fact. |
| 13. | You can click the Issue Linker bar to select check boxes for each issue you want to link to the fact. |
| 14. | When you are finished, click OK to send the fact to CaseMap. |
| 15. | In the message box, click Yes to view the new fact in CaseMap. |
Notice that the new fact now displays in the Facts spreadsheet and is sorted according to the date.
|
| 1. | From the Annotation mode list, click Annotate Text. |
| 2. | Drag your mouse pointer over the text you want to annotate to open the New Annotation dialog box. |

The text you selected displays in the Document Text box.
| 3. | In the Note tab, type in information you want. |
| 4. | Click the Create New Extract button to open the Send to CaseMap - New Extract dialog box. |
Notice that the excerpt you highlighted in the document now displays in the Text Selection field and is enclosed in brackets. The brackets indicate that a link is set from the extract record to the source file.

|
Do not delete the brackets from text excerpts imported using the Send to CaseMap utility. Brackets prevent CaseMap's recognition of short names and designate actual document text for the import.
|
| 5. | In the Text Selection field, review the extract you highlighted in the extract file. |
| 6. | Type in any additional field information you want to add to the extract record. |
| 7. | Click on the Issue Linker bar at the bottom of the box and select check boxes for applicable issues to link this extract. |
| 8. | When you are finished, click OK. |
| 9. | In the Case Shortcuts pane, click on the Extracts and Authorities spreadsheet. |
The new extract record displays with a link to the source file and the annotated text displaying in the Extract Text field.
|
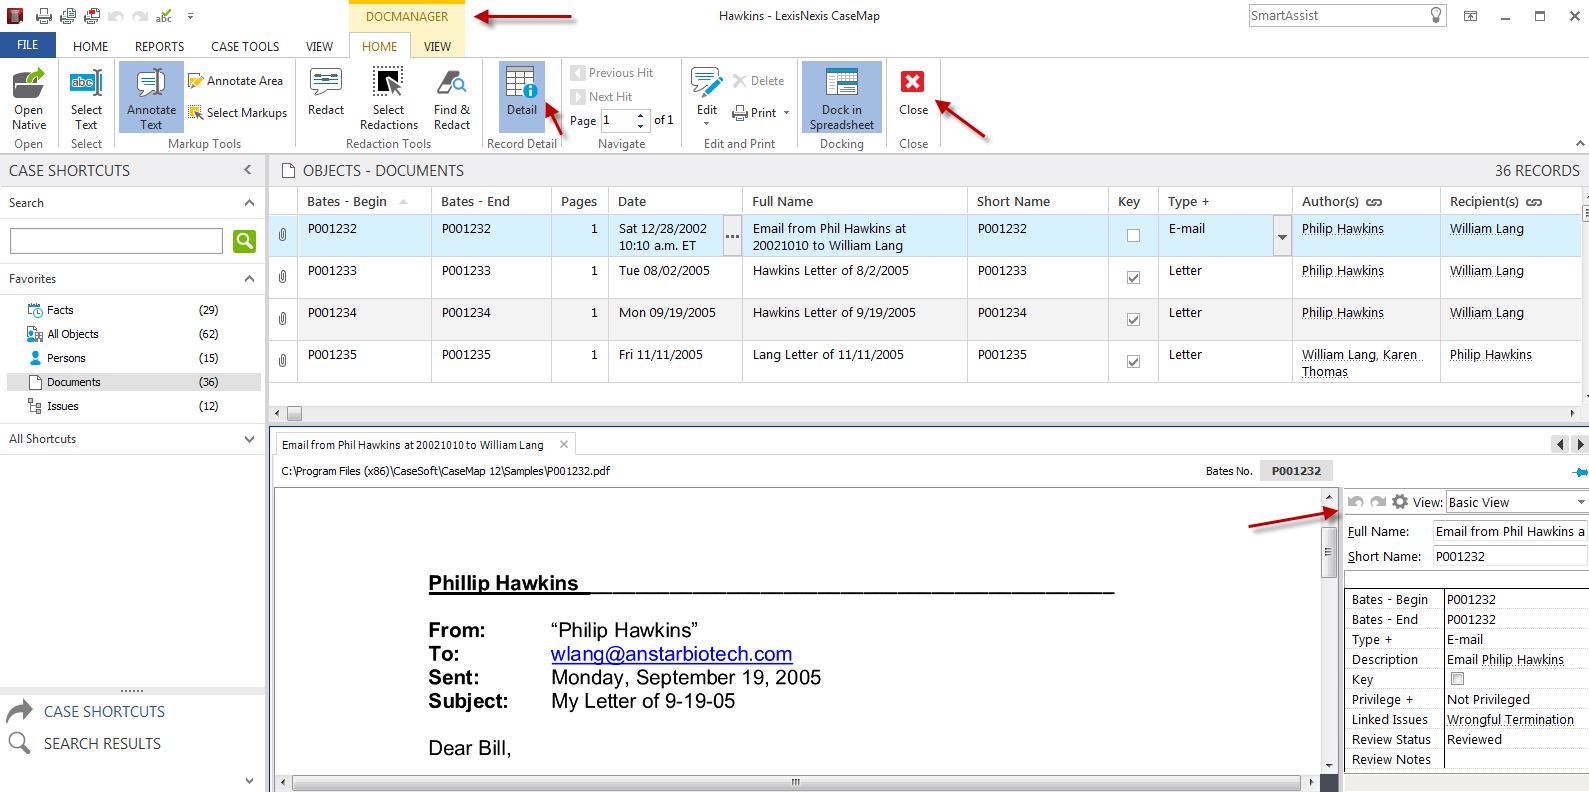
| 1. | On the DocManager toolbar, click the Detail button. |
You can also click the Home ribbon and then click Detail  . .
The Detail button is highlighted and the Detail sidebar is displayed to the right side of the document in the DocManager.

|
Once a document is closed and reopened, the Record Detail Sidebar no longer exist and must be re-established.
|
| 2. | In the Detail dialog box, review and/or modify content for the case record. |
| 3. | Click the Close button to save your changes. |
|