Synchronized Transcripts

You can work with synchronized transcripts in the following ways to enrich presentations:

Add them directly into presentations. There are several methods for accomplishing this. A common way to add synchronized transcripts is described in Adding and Removing Items. Other methods, more typically used to add synchronized transcripts during presentations. are described in Using the Show Item Command, and in Controlling Item Presentation.
Create media clips with synchronized text playback.
Add media clips taken from synchronized transcripts to playlists and presentations.
Hide or show the synchronized text in presentations. If you choose to show synchronized text, you can specify its position on screen, font characteristics, the number of lines to display, and highlighting options. You can also modify the timing, name, and other properties of the clips you create from transcripts.
Create text clips and video stills. For more information, see: Text Clips and Video Stills.
hmtoggle_plus1To create a media clip from a synchronized transcript

This procedure describes how to create an individual media clip by using the Clip Creator utility. However, it is also possible to create multiple clips at a time by importing a clip list file. For more information on creating and importing clip list files, see: Importing Media and Clip Lists.
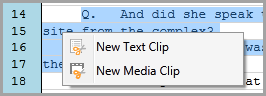
1.On the HOME tab, click the Transcripts navigation bar.
2.Select the synchronized transcript that you want to create a clip from.

The media player and clip creator open next to the transcript.
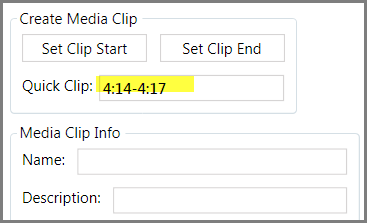
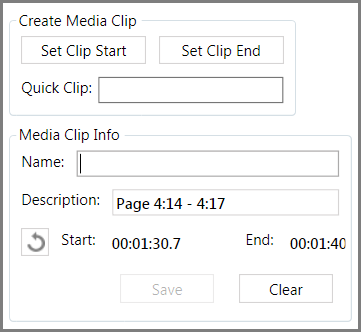
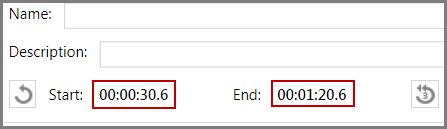
3.Specify the start and stop times of the clip by using one of the following methods:

Method

Steps

Select transcript text

1.Select the lines of transcript that you want in the clip.
2.Right-click the selection and then click New Media Clip.

TranscriptSelectionRightClick

The media player starts playing the video at the start of the selection and pauses playback when the end of the selection is reached. The Start and Stop times are also populated accordingly.

3.Type a name for your clip. Note that the description field is auto-populated with the page and line numbers of the clip.
4.Edit the description as necessary and then click Save.

Type the page and line numbers (Quick Clip)

1.Type the page and line range of the clip into the Quick Clip field and then press Enter.

QuickClip

The Start- and End time of the page and line range are populated in their respective fields. The Description field is populated with the Page and line range.

QuickClipResult

2.If necessary, you can more precisly adjust the timing of your clip. For more information see the procedure To precisely edit the timing of a clip in this topic.
3.Type a name for the clip, and optionally, edit the clip description, and then click Save.


ac_tip_icon

You can use any of the following formats to indicate the page/line range for the clip:

Pg.Ln+Pg.Ln

Pg:Ln+Pn:Ln

Pg.Ln-Pg.Ln

Pg:Ln-Pg:Ln

For example, 4:14-4:17 starts the clip on page 4, line 14 and ends it on page 4, line 17.


Use the play button and the media slider

1.Use the play button and media slider to move to the start of the clip and then click Set Clip Start.

MediaPlaybackControlsWithCaptions

2.Use the play button and media slider to move to the end point of the clip and then click Set Clip End.
3.In the Name field, type a name for the clip and then click Save.

The clip is visible in the media clip list.

hmtoggle_plus1To add clips from a synchronized transcript to a playlist or presentation
1.On the HOME tab, click the Transcripts navigation bar.
2.Select the transcript that has the clip you want to add to a presentation or playlist.
3.In the clip list, select the clips you want to add to a presentation or playlist.
4.Select from among the following options:

To do this:

Follow these steps:

Add clips to a presentation

Do one of the following:

On the ribbon in the Add to group, click Presentation, and then select the presentation you want to add the clips to.
Right-click the clip selection, click Add to Presentation, and then select the presentation you want to add the clips to.

Add clips to a playlist

Do one of the following:

On the ribbon in the Add to group, select Playlist, and then select the playlist you want to add the clips to.
Right-click the selected clips, click Add to Playlist, and then select the playlist you want to add the clips to.
hmtoggle_plus1To preview a synchronized transcript clip
1.On the HOME tab, click the Transcripts navigation bar.
2.Select the transcript that has the clip you want to preview.
3.In the clip list, do one of the following:
Double-click the clip.
Select the clip you want preview and then click the play button on the media player.

The clip video plays in the media viewer. In the transcript window, the current transcript line is indicated by a red box around the line.

hmtoggle_plus1To rename or edit the properties of a clip
1.On the HOME tab, click the Transcripts navigation bar.
2.Select the synchronized transcript that has the clip you want to rename or edit.
3.In the clip list, follow steps that go with what you want to do:

Action

Steps

Rename the clip

1. Do either of the following:

On the ribbon, in the Actions group, click Rename.
Right-click the clip, and then click Rename.

2. Type the new name, and then press Enter.

Rename the clip or edit its properties

1. Do either of the following:

On the ribbon, in the Actions group, click Edit.
Right-click the clip, and then click Edit.

The clip properties dialog box opens.

2. Edit properties as necessary then click OK.

hmtoggle_plus1To precisely edit the timing of a clip

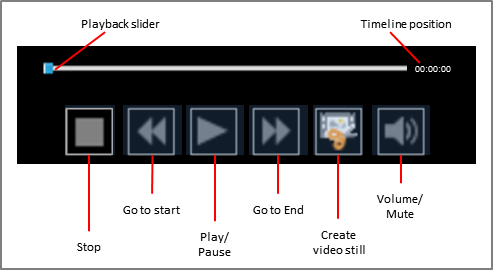
As you create a new clip or edit an existing clip, can precisely adjust the start or end of the clip.

The method of accomplishing this is to begin playing the clip at a position slightly ahead of the desired start time or end time. Then, as playback proceeds, you click the Set Clip Start or Set Clip End at the exact position where you want the clip to start or end.

To precisely cue the player, use the following options in the Clip Creator, individually or in combination:

Options

ClipReplayButton Click the Restart button to start playing the clip again from the start.

ClipGoBack3SecondsButton Click the Back 3 seconds button to start playing the clip 3 seconds before the end of the clip.


Depending on whether you want to change the start or the end time, perform the following mouse operations on the start time field or the end time  field:

ClipCreatorStartAndEnd

Click the left mouse button on the field to move the time back 1 second, or press Shift + click to move the time back 1/10th of a second.
Click the right mouse button on the field to advance the time 1 second, or press Shift + right click to advance the start time 1/10th of a second.
Note that these actions cause playback to immediately resume.

As playback resumes, when the player gets to the precise moment where you want the clip to start or end, click Set Clip Start or click Set Clip End.

hmtoggle_plus1To set presentation options for synchronized transcripts
1.Open the Sanction Options dialog box using either of the following methods:
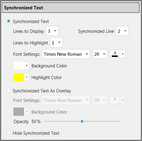
To configure options from this window:

Follow these steps:

Main program window

On the FILE tab, click Options.

Presentation window

In the presentation window, select the presentation options icon.

PresentationOptionsIcon

2.Click Presentations.

sanctionoptionssynchronizedtext_zoom30

3.Configure options as needed. These are described as follows:

Main option

Description

Synchronized Text

Select this option to show synchronized text in the item window. Text appears below the media player.

Lines to Display controls the number of lines of text that are shown. The number can range from 1 to 10.
Synchronized Line specifies the line that holds the currently playing text.
Font Settings specify the font, size and color of the text.
Background Color specifies the background of the text field that displays the synchronized text.
Highlight Color specifies the color that is applied to the currently playing line of transcript.

Synchronized Text As Overlay

Select this option to overlay synchronized text  on top of the media player.

Font Settings specify the font, size and color of the text.

Hide Synchronized Text

Select this option to hide synchronized text so that it does not appear at all.

4.Click OK.
related_topics_buttonRelated Topics

Need additional help? Email the Sanction Support team at: casemap.support@lexisnexis.com, or contact a support representative at 877.301.0344. The Sanction Support team is available between the hours of 9:00 a.m. to 9:00 p.m. Eastern Time, Monday - Friday.

Copyright © 2015 LexisNexis. All rights reserved.