A ReportBook is a compilation of multiple CaseMap reports that include configurable front-matter elements, including: cover page, table of contents, confidentiality statement, introduction, and report-specific title pages.
You can use ReportBooks for the following purposes:
| • | Compile your own selection of reports into a custom ReportBook. |
| • | Help keep clients and case staff informed of case developments. |
| • | Facilitate collaboration and information sharing. |
| • | Provide key inputs into the case analysis process. |
| • | Customize text and graphics on ReportBook templates. |
| • | Preview drafts onscreen before sending, printing or saving. |
| • | Print, save to PDF, and attach as PDF to an email. |
| • | Retain ReportBook data with confidence because they are compiled independent from spreadsheet views. |
| • | Share copies of files attached to case objects with people who do not have access to your CaseMap database. |

|
All pre-built and saved ReportBooks are shared for all users in the case and available on the Reports ribbon by selecting ReportBooks. All custom ReportBooks are tracked in the Manage ReportBooks dialog box with the creation author's name and date noted.
|
Differences from Reports
| • | A ReportBook generally consists of a compilation of several reports, with added cover page, table of contents, and separator pages. A reports are just individual reports. |
| • | ReportBooks differ from standard reports in that they are based on standardized layouts that function independently from your spreadsheet views. Changes made to spreadsheet views do not affect ReportBook formats. |
| • | ReportBooks are more configurable than reports, and that's by design so they can serve your purposes with more flexibility. For example, ReporBook might include an Issue Outline, a Cast of Characters, a Chronology of Key Facts, and a Document Index. Another ReportBook could feature key facts, showing date, time, fact text, and source fields, sorted by the date and time. |
Similarities to Reports
ReportBooks and reports are similar in the following ways:
| • | Both are accessible from the Reports ribbon. |
| • | Templates are provided for both ReportBooks and reports. |
| • | Both ReportBooks and reports provide customization options. |
|
ReportBooks provide the following optional elements:
| • | Confidentiality statement |
| • | Selection of reports to include, |
| • | Reports may include embedded document links, which allows you to share the report and supporting files with others who do no have access to CaseMap or the case. Once a ReportBook in printed to PDF, spreadsheet records with attached files are embedded in the PDF file for viewers to access.
|

|
When you open a ReportBook in Adobe Acrobat or Reader, look for the paperclip icon in the lower left corner of the program. It indicates that a linked document is available. Double-clicking on the file in the Attachments pane opens it in a new window in its native application.
|
Each of these elements may be customized as follows:
| • | Add graphics, for example, your company logo. |
| • | Add CaseMap fields. Fields are designated as follows: [[%FieldName%]]. Fields are used in the default ReportBooks for page numbering and for other other template elements. For example, [[%CaseName%]] appears on the title page of pre-built ReportBooks. For the Hawkins example case, it prints as Philip Hawkins v. Ansar Biotech Industries. |
| • | Configure layout options, including page orientation, borders, and more. |
For more information, see Creating custom ReportBooks, Embedding linked documents in reports.
|
One of the best ways to learn to use ReportBooks is to experiment with customizing them using the Hawkins demo case built into CaseMap. You can refresh the case to reset data and settings as you become more adept at compiling a ReportBook layout that best meets your case needs.
| • | Run and print preview the pre-built ReportBooks — Start by running each pre-built ReportBooks and then examining the output using print preview. In this way you can familiarize yourself with default options for each ReportBook. |
| • | Customize options in the prebuilt reports -- Run each prebuilt report again, this time customizing options such as |
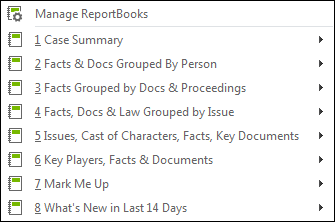
| • | Open the Manage ReportBooks tool — This feature is accessible on the Reports ribbon by clicking ReportBooks > Manage ReportBooks. The Manage ReportBooks tool allows you to modify or customize a new ReportBook. Here you will see the ReportBook descriptions. Clicking the Modify button grants you access to the components included in each ReportBook. Click each of these buttons to review the editing options available. |
| • | Practice creating custom ReportBooks — Practice using the New ReportBook Wizard to create your own from scratch. |
|
| 1. | Click Reports then click ReportBooks.
 |
| 2. | Select one of the prebuilt templates, and then click Preview to see how it will look when printed or saved, or click Customize to access customization options for the ReportBook. |
When you use the Intake Interview Jumpstart form, CaseMap automatically creates a ReportBook of the imported information for you.
When you complete the import wizard, a message box indicates that the ReportBook is created and available for to preview. You can save the ReportBook to a Reports folder on your network for reference purposes.
For more information, see Printing pre-built ReportBooks.
|
When you use the Intake Interview Jumpstart form, CaseMap automatically creates a ReportBook of the imported information for you.
For more information, Importing the Intake Interview Form.
|
Before creating a custom ReportBook, first arrange your spreadsheet fields in the order you want them to display in the report and insert/hide any fields, as needed. You may also want to run a filter on a spreadsheet to remove records or data that you do not want to include.
For more information, see Creating custom ReportBooks.
Once your spreadsheet view is adjusted for the ReportBook layout, use the Create Report from Current View template. By using this utility, the new ReportBook is generated off the spreadsheet view you organized so you can customize it.
|
Changes made to the case after creating the ReportBook will not be reflected in the a saved ReportBook file.
|
|
