The CaseMap SharePoint Web Parts site allows you to display a list of active staff members in a CaseMap case without having to manually retrieve the data from the case.
In the CaseMap - Case Team Members panel, you can select the case from which you want to display a list of users. On the CaseMap SharePoint Web Parts site, the Case Team Members list displays user names in a first name, last name format. The listing is sorted by last name. Case staff that have been deleted from a case will display with "Deleted" next to their short name in the list.

| 1. | Open the CaseMap SharePoint Web Parts site. |
| 2. | Click on the case tab for which you want to display case staff. |
| 3. | Click on the Site Actions button  in the upper right corner and then click Edit Page. in the upper right corner and then click Edit Page. |
The Edit Content page displays with the web part page template for you to edit.
| 4. | Click on the Add a Web Part link in the web part zone where you want the case staff list to display. |

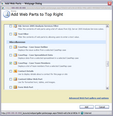
| 5. | In the Add Web Parts dialog box, scroll down to the All Web Parts section until you find the Miscellaneous options. |

| 6. | Under the Miscellaneous section, select the CaseMap - Case Team Members check box. |
The new CaseMap - Case Team Members web part displays in the area you designated. You now need to edit the web part so that data displays in it.
| 8. | In the new CaseMap - Case Team Members web part, click the Edit button. |

| 9. | Click Modify Shared Web Part. |
The CaseMap - Case Team Members panel now displays to the right.
| 10. | In the CaseMap - Case Team Members panel, type in the URL for the CaseMap Server REST web service. |

For example, for Windows authentication: http://[server:port]/CaseMapAD/CMServerAD.svc
For simple authentication: http://[server:port]/CaseMapLA/CMServerLA.svc
| 11. | In the Authentication Type area, click the authentication type you want to use: Windows Authentication or Local User. |
If you click Local User, then enter your user name and password.
| 12. | Click the Test Connection button to verify the connection to the web service and the CaseMap Server. |
When the connection is established, a CaseMap Case field displays.
| 13. | In the CaseMap Case list, click on the case containing the information you want to display. |

| 14. | In the Appearance section, click in the Title field, if you want to edit the case team members title. |
| 15. | Click the Ellipses button  . . |
The default name is CaseMap - Case Team Members. You can change the title to reflect the current case name, such as Hawkins v. Anstar Case Team Members.
| 16. | In the Text Entry dialog box, type in the case team member name you want to display in the web part. |
| 17. | Click OK to save your changes. |
| 18. | Click the Apply button to view your changes without closing the pane. |
Click OK to save your changes and close the pane.
The case team members list now displays in the CaseMap - Case Issue Outline web part.
| 19. | On the SharePoint toolbar, click the Publish button  to publish this data on the case page so case staff can now view it. to publish this data on the case page so case staff can now view it. |
To customize spreadsheet data display, see Customizing data display.
|


