About TimeMap ribbon and toolbar buttons

TimeMap has a Quick Access toolbar to help you easily accomplish tasks. You can customize to display which buttons you use most frequently. By default, the toolbar displays the most commonly used buttons. Place your mouse pointer over each button to view its name.
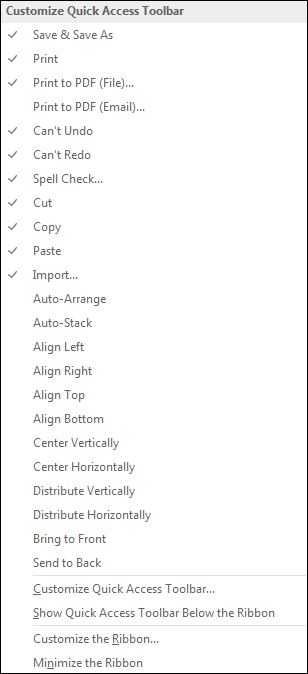
Click on the More Buttons tm_more_button icon at the far right of the toolbar to view a listing of all available buttons. Select a button in the button list to add or remove a button to or from the toolbar. All checked buttons in the list display on the toolbar.

tm_qa_toolbar

The toolbar submenu allows you to determine which toolbar/ribbons are displayed in TimeMap, and customize the Quick Access toolbar, to include customizing ribbons and keyboard shortcuts using the Customize dialog box.

To reset the toolbar to its original view, click on the More Buttons icon tm_more_button to view the toolbar menu, and then select Reset at the bottom of the Ribbon Customization dialog box.

tm_standard_toolbar_menu_zoom25

hmtoggle_plus1Quick Access toolbar buttons

tm_qa_toolbar

Reference the following table for a listing of the Quick Access toolbar buttons and descriptions.


ac_note_icon

Placing your pointer over an icon (i.e., Quick Print) within the application provides a brief description/use of the selected icon.


Quick Access Toolbar Buttons

Button

Name

Use

tm_save_saveas_button

Save & Save As

Use the Save & Save As button to Save the timeline as a Visual, Template or Graphic.

tm_quick_print_button

Print

Use the Quick Print button to print the timeline to a local or network printer.

tm_print_pdf_button

Print to PDF (File)

Use the Print to PDF (File) button to print to an Adobe Acrobat PDF file. Opens the Save As PDF dialog box and allows you to save the PDF file to a local or network directory.

tm_print_pdf_email_button

Print to PDF (Email)

Use the Print to PDF (Email) button to compile a PDF and then opens the default email application so you can save the PDF file as an e-mail attachment.

TM_undo_button

Undo

Use the Undo button to undo an edit.

tm_redo_button

Redo

Use the Redo button to redo an edit.

tm_spelling_button

Spellcheck

Use the Spellcheck button to check spelling and grammar.

tm_cut_button

Cut

Use the Cut button to remove selected information to the Clipboard so that you can paste it in another location on the timeline.

tm_copy_button

Copy

Use the Copy button to copy selected information to the Clipboard so that you can paste it into another location on the timeline.

tm_paste_button

Paste

Use the Paste button to add content from the Clipboard onto your timeline.

tm_import_facts_textfile

Import

Use the Import button to import facts from a text file.

tm_autoarrange_button

Auto Arrange

Use the Auto Arrange button to automatically reposition existing fact boxes.

tm_autostack_button

Auto Stack

Use the Auto Stack button to apply a group of commands to improve the appearance of your timeline.

tm_align_left_button

Align Left

Use the Align Left button to position the left side of all selected elements at the same vertical position as the first element chosen.

tm_align_right_button

Alight Right

Use the Align Right button to position the right side of all selected elements at the same vertical position as the first element chosen.

tm_align_top_button

Align Top

Use the Align Top button to position the top of all selected elements at the same vertical position as the first element chosen.

tm_align_bottom_button

Align Bottom

Use the Align Bottom button to position the bottom of all selected elements at the same vertical position as the first element chosen.

tm_center_vertically_button

Center Vertically

Use the Center Vertically button to move the selected group of elements so they are equal distance from the top and bottom of the chart.

tm_center_horizontally_button

Center Horizontally

Use the Center Horizontally button to move the selected group of elements so they are equal distance from the left and right of the chart.

tm_distribute_vertically_button

Distribute Vertically

Use the Distribute Vertically button to position the selected elements in equal increments from the element with the highest vertical position to the one with the lowest.

tm_distribute_horizontally_button

Distribute Horizontally

Use the Distribute Horizontally button to position the selected elements in equal increments from the element with the highest horizontal position to the one with the lowest.

tm_bring_front_button

Bring to Front

Use the Bring to Front button to place the selected element of a layered stack of graphics or text on top.

tm_send_back_button

Send to Back

Use the Send to Back button to place the selected element of a layered stack of graphics or text on the bottom.


related_topics_buttonRelated Topics


Need additional help? Email the CaseMap Support team at: casemap.support@lexisnexis.com, or contact a support representative at 800.543.6862 (Option 2, then Option 4). The CaseMap Support team is available between the hours of 9:00 a.m. to 7:00 p.m. Eastern Time, Monday - Friday.

Copyright © 2018 LexisNexis. All rights reserved.