Annotations

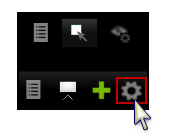
You can access annotation tools in the exhibit window via the IMAGE TOOLS tab, and from the Presentation window via the Annotation Tools Gallery button.

imagetoolstab_zoom50

The IMAGE TOOLS tab in the main program window


PresentationWindowTools_ImageGalleryHighlighted

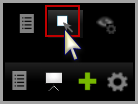
The Annotation Tools Gallery button in the Presentation window


ac_caution_icon

During a presentation, annotations made in the exhibit viewer of the main program window can be made to be immediately visible in the Presentation window. Conversely, annotations made in the Presentation window can be made to be immediately visible in the exhibit viewer. However, for this reciprocity to work consistently, the annotation layer to which the annotation was applied must be configured to be visible in both the exhibit viewer and the Presentation window. For more information about annotation layers, see: Annotation Layers.


hmtoggle_plus1Annotation Tools

Annotation tools are available in the main window and in the presentation window. The function of each is described here:

Tool

Description

Select

Selects annotations that have been added to the exhibit.

Allows you to re-size, reposition, and delete annotations.

Crop Zoom

Zooms in on a rectangular area of the exhibit.

Use this tool to draw attention to a part of the exhibit or in conjunction with the Screen Capture tool to create a screen capture. For more information on screen captures, see: Screen Captures.

Tear Out

Creates floating zoom areas that can be resized, repositioned, or closed as needed. Tear outs contains whatever annotations that were applied to the exhibit as well as any that are created as the tear out is open. For more information see: Tear Out Tool.

Magnifier

Creates a movable rectangular area that magnifies that part of the exhibit it is moved over.

Pan

Moves the exhibit around in the exhibit window.

Erase

Erases annotations.

Highlight

Creates a translucent highlighted area. The default highlight color is yellow but it can be changed by selecting a different color from the Fill Color control.

Arrow

Creates an arrow.

Line

Creates a line.

Pen

Creates a freehand line.

Rectangle

Creates a rectangle.

Ellipse

Creates an ellipse.

Redaction

Creates a rectangle.

Text

Allows you to type text onto the exhibit. The text box is bordered and can be moved or re-sized. You can also set the default font and font style. Note that this tool is available in the main program window only.

Line Size

Sets the line size for arrows, lines, pens, rectangles, and ellipses.

Line Color

Sets the line color for arrows, lines, pens, rectangles, and ellipses.

Fill Color

Sets the fill color for the highlight, rectangle, and ellipse.

Layers

Provides control over the visibility of annotations. For more information, see: Annotation Layers.

Rotate Right

Rotates the exhibit clockwise 90 degrees.

Rotate Left

Rotates the exhibit counterclockwise 90 degrees.


hmtoggle_plus1To annotate an exhibit from the IMAGE TOOLS tab
1.On the HOME tab, click the Exhibits taskbar.
2.Select the exhibit you want to annotate.
3.Do one of the following:
Double-click the exhibit.
Select the IMAGE TOOLS tab.
4.Annotate the exhibit by using the tools in the image toolbar.


hmtoggle_plus1To annotate an exhibit from within the presentation window
1.In the presentation window, open the exhibit you want to annotate.
2.Select the annotation tool gallery button.

PresentationWindowTools_ImageGalleryHighlighted

The annotation tool gallery opens.

3.Select an annotation tool and then apply the annotation to the exhibit.


hmtoggle_plus1To set defaults for annotation tools
1.On the FILE tab, click Options.
2.Click Exhibits.

sanctionoptionsexhibits_zoom50

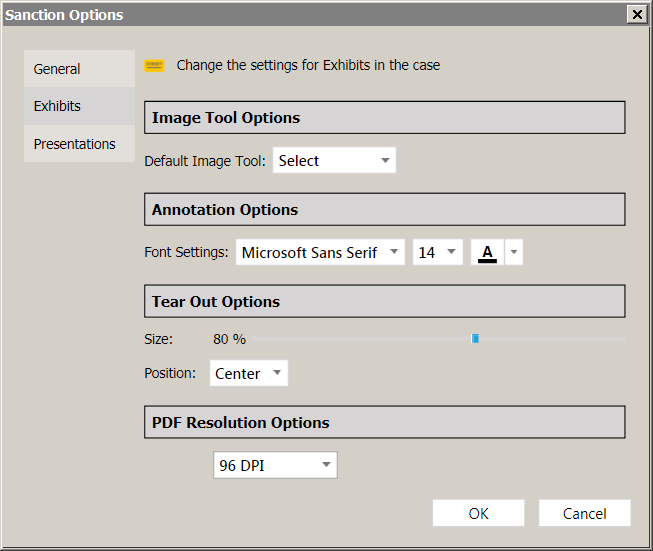
File > Options > Exhibits


3.Select options as needed.

Tool

Options

Image tool

Set the default as Highlight, Arrow, Line, Pen, Rectangle, Ellipse, Crop, or Tear Out.

Annotation font

Font, size, and color of the annotation font.

Tear Out

Size and position in the presentation window where the tear out will appear.

PDF Resolution

Adjust DPI if a PDF is fuzzy. The default value is 96 DPI, with stops at 150, 200, and 300.

4. Click OK.


ac_note_icon

You can also access Sanction options from the presentation window. In the presentations window, select the presentation options button.

PresentationWindowOptonsButtonA

related_topics_buttonRelated Topics

Need additional help? Email the Sanction Support team at: casemap.support@lexisnexis.com, or contact a support representative at 877.301.0344. The Sanction Support team is available between the hours of 9:00 a.m. to 9:00 p.m. Eastern Time, Monday - Friday.

Copyright © 2015 LexisNexis. All rights reserved.