About ReportBooks

Contents
ReportBooks are living documents that can be used throughout the life of the trial that are essential for ensuring that clients and case staff stay abreast of case developments and can readily collaborate in the case analysis process.
A ReportBook is a compilation of any number of CaseMap reports packaged with optional elements such as a cover page, table of contents, confidentiality statement, introduction, and report-specific title pages. The layout of a ReportBook is similar to that of the standard reports generated when you print one of CaseMap's spreadsheet views. It's composed of field data based on the pre-built template or criteria that you specify. ReportBook reports differ from standard reports in that they are saved layouts that work independently from your spreadsheet views. This ensures that changes made in spreadsheets will not affect ReportBook formats.
A ReportBook can contain an unlimited number of reports. Each ReportBook report is composed of one or more columns of case data arranged in a desired sequence. The rows that appear in the report are listed based on your sort criteria. You can also filter data to permanently limit the number of rows displaying in the report to only those that meet your specifications.
For example, one ReporBook might include an Issue Outline, a Cast of Characters, a Chronology of Key Facts, and a Document Index. A ReportBook can also contain multiple reports based on one CaseMap spreadsheet, such as five reports based on different views of case objects.
Another ReportBook could include a report format for case facts that contains the Date & Time, Fact Text, and Source(s) fields; is sorted by the Date & Time field; and is filtered so that it displays only Key facts.
On the Reports ribbon, you can access ReportBook tools and features, as well as several pre-built ReportBooks that are included for use in every case. You can also customize your own ReportBook and save it to the ReportBooks menu to print later as case information develops. Once you are finished creating a ReportBook, you can send it to a printer or print to a PDF file.
|
All pre-built and saved ReportBooks are shared for all users in the case and available on the Reports ribbon by selecting ReportBooks. All custom ReportBooks are tracked in the Manage ReportBooks dialog box with the creation author's name and date noted. |
Reference the following table for reasons why using ReportBooks make compiled multiple reports a must for your organization.
|
| Practice using ReportBooks on example case data |
One of the best ways to learn how to use ReportBooks included in CaseMap or to experiment with customizing your own, is to practice and experiment using the features with demo data. We recommend that you print and compile ReportBooks using the Hawkins example case provided with each installation of CaseMap. You can refresh the case to reset data and settings as you become more adept at compiling a ReportBook layout that best meets your case needs.
|
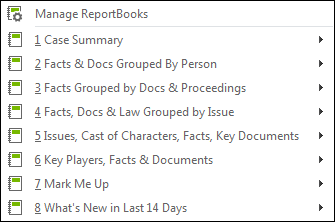
CaseMap provides you with eight pre-built ReportBooks to save you time in compiling multiple, polished reports that include case analysis data you need to review to monitor case progress efficiently. You can access them on the Reports ribbon and clicking ReportBooks and then clicking the prebuilt option from the pop-menu.
When you use the Intake Interview Jumpstart form, CaseMap automatically creates a ReportBook of the imported information for you. When you complete the import wizard, a message box indicates that the ReportBook is created and available for to preview. You can save the ReportBook to a Reports folder on your network for reference purposes. For more information, see Printing pre-built ReportBooks, Importing the Intake Interview Form. |
Before creating a custom ReportBook, first arrange your spreadsheet fields in the order you want them to display in the report and insert/hide any fields, as needed. You may also want to run a filter on a spreadsheet to remove records or data that you do not want to include. For more information, see Creating custom ReportBooks. Once your spreadsheet view is adjusted for the ReportBook layout, use the Create Report from Current View template. By using this utility, the new ReportBook is generated off the spreadsheet view you organized so you can customize it.
|
Embedding linked documents in report and ReportBooks printed to PDF files allows you to share the report and supporting files with others who do no have access to CaseMap or the case. Once a ReportBook in printed to PDF, spreadsheet records with attached files are embedded in the PDF file for viewers to access. Click the paperclip icon in the lower left corner of Adobe Acrobat or Reader opens the linked documents in an Attachments pane. Double-clicking on the file in the Attachments pane opens it in a new window in its native application. For more information, see Embedding linked documents in reports. |
ReportBooks are easily customized to meet the needs of your organization or case staff.
Each ReportBook title page can be customized with graphics and content that reflects your organization and/or case staff needs.
There are a variety of methods you can use to create custom ReportBooks. You can copy and modify existing ReportBooks, add reports to pre-existing ReportBooks, or create a ReportBook entirely from scratch. Learn more about each option to find results that quickly meet your reporting needs. For more information, see Creating custom ReportBooks. |