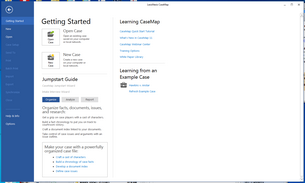
Once you have a case that works well as a starting point for other similar cases, you can save it as a template to use when a new case begins. The Create Case Template wizard includes steps for exporting a case's framework and any data you want to retain in the new template, such as the Issues outline, standard questions that can be re-used in a new case, and any general research that may apply to cases of that type. Case staff and any custom fields created in the previous case are saved into the new case template.
While you may have multiple templates created and stored, you can only use one template to create a case. If you have multiple templates that are similar, we recommend that you have established naming conventions that specify the template you need for a particular case.

| 2. | Click New, and then click Case Template. |
| 3. | Once the Case Template Wizard box opens, click Next. |
| 4. | In the Select Source Case box, click the Browse button to navigate to and select the case you want to use as the source for the new template. |
You can only import one template per case.
| 5. | In the Select the case template source box, select the case and click Open. |
| 6. | Click Next to continue. |
| 7. | In the Select Template Name box, click Browse and navigate to the directory location where you want to store the template. |
| 8. | In the File name field, type in a template name and click Save. |
| 9. | Click Next to continue. |
| 10. | In the Clear Existing Records box, select the Record Types check boxes for the records you want to clear from the existing template. |
Leave check boxes clear for the records you want to retain in the new template, such as any issues or questions.
| 11. | Click Next to continue. |
| 12. | In the Completing the Case Template Wizard box, verify the case source location and the folder and name for the new template, then click Finish. |
| 13. | In the Case Log On [Template] box, select your user logon and type your password, then click OK. |
If you are the only user listed in the case template, the Case Log On box will not display.
The new case template now launches in CaseMap.
| 14. | Review the template structure and verify that all the content you selected to retain in the case template imported correctly. |
| 15. | Customize the template, as needed, for new cases. |
|
| 1. | Click the File tab, click New and then click Local Case. |
| 2. | When the New Case Wizard launches, click Next. |
| 3. | In the Case Setup box, type in the case name in the Case name field. |
| 4. | In the Default time zone list, click on the time zone where the new case events occur, then click Next. |
| 5. | In the Select Template box, click the Add button. |
| 6. | In the Select Custom Template box, select the template you want to use. |
The selected template name and path now display in the Select a template box.
If you selected the wrong template, click the Remove button to delete it.
| 7. | Click Next to continue. |
| 8. | In the Manage Staff Members box, add or remove any users and click Next. |
| 9. | In the Case File box, type in the name for the case File name field. |
| 10. | Click Browse to navigate to the directory location where you want to store the new case, then click OK. |
| 11. | Click Next to continue. |
| 12. | In the Completing the new Case Wizard box, click Finish to create the new case. |
| 13. | In the Case Log On box, select your user name and type in your password, then click OK. |
| 14. | When new case launches in CaseMap, verify the case name in the upper left corner of CaseMap. |
| 15. | When the Case Jumpstart Wizard launches, you can click Cancel at this time and reopen it later to enter a Cast of Characters. |
If you don't want the wizard to launch each time a new case is created, clear the Show when opening a new case check box.
|

