You can customize a spreadsheet view and then share it with other case users.
What is shared?
When a view is shared, the following elements of the view are carried over to other users:
| • | Column selection, including custom fields |
Who can I share my view with?
A view may be shared with all staff or with users individually. Or you can share the view with members of the author or scribe roles, or with combinations of individuals, authors, and scribes.

|
Role assignments are made when the case is created. For more information on assigning users to roles and cases, see Adding users to cases.
|
Edits and locks
Other users may not edit a view you have shared with them. However, you can open the view again to edit it or to add or remove users. To edit a view you have shared with others, you must first unshare it, which unlocks it for editing. Then you can edit it, and share it again.
Opening a view shared with you
You open a view that has been shared with you from the View menu, the way you open other views you have defined yourself. For more information, see the procedure in this topic on opening a view that has been shared with you.
Ways to share views
You can share a spreadsheet view directly from the spreadsheet or by using the View menu.
| 1. | Open a spreadsheet and work with it, customizing the view until you have the view you want to share. |
| 3. | Select users to share the spreadsheet view with. |
| o | To select users individually, select their name in the list. |
| o | To select groups of users, click All Staff, All Authors, or All Scribes. |
| o | To exclude a user individually, clear the check box for the user. |
| 4. | Click OK in the warning saying the name is already in use. |
The Rename View dialog box opens.
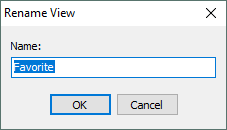
| 5. | Type a name for the view and then click OK. |
The spreadsheet view is shared. Users you have shared it with may view it.
|
| 1. | Open a spreadsheet and work with it, customizing the view until you have the view you want to share. |
| 2. | On the View ribbon, click Current View and then click Define Views.
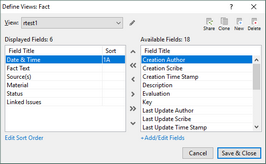 |
The Define Views dialog box opens.
| 3. | Edit the view as needed in the Define Views dialog box. For more information on using this dialog box to edit spreadsheet view, see: Creating spreadsheet views. |
| 4. | Click the  (pencil) next to the current name of the view. (pencil) next to the current name of the view.
The Rename View dialog box opens. |
| 5. | Type a name for the view and then click OK. |
| 6. | Click Share.
|
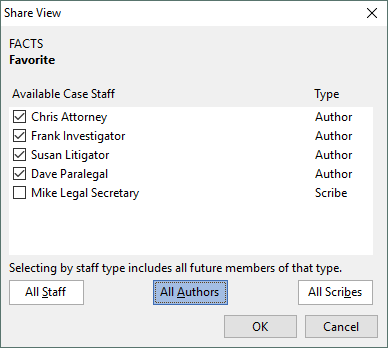
The Share View dialog box
| 7. | Select users to share the spreadsheet view with. Users can be selected individually from the list or by group membership, as follows: |
| o | To select user's individually, select their name in the list. |
| o | To select groups of users, click All Staff, All Authors, or All Scribes. |
| o | To exclude a user individually, clear the individual user's check box. |
The spreadsheet view is shared. Users you have shared it with may view it.
|
You can change a shared spreadsheet view but first you must stop sharing it.
| 1. | In the CASE SHORTCUTS list, select the spreadsheet type that has the shared view. |
| o | If the shared view does not open by default, then click View, click Current View, and then select the shared view you want to edit.
The shared spreadsheet view opens.
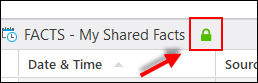 |
| 2. | Click the lock icon.
The Share View dialog box opens. |
| 3. | Click All Staff until the check boxes are cleared for all users, then click OK.
A warning opens that says the view will no longer be shared. |
| 4. | Click Yes.
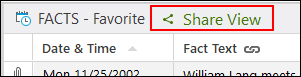
The spreadsheet view is no longer shared. The lock button is replaced by the Share View link |
| 5. | Change the view as needed; when ready to share the view again, click Share View. |
| 6. | Select staff you want to share the view with, then click OK.
Other staff must close then re-open CaseMap, then they can access the view under the View menu for that spreadsheet. |
|
If you have shared a spreadsheet view, you can add or remove staff.
| 1. | In the CASE SHORTCUTS list, select the spreadsheet type that has the shared view you want to add users to or remove them from. |
| 2. | On the View ribbon, click Current View and then click Define Views. |
| o | In the View list, select the shared view you want to work with, if it is not already selected.
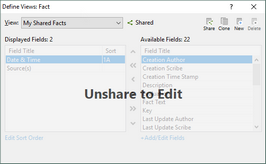 |
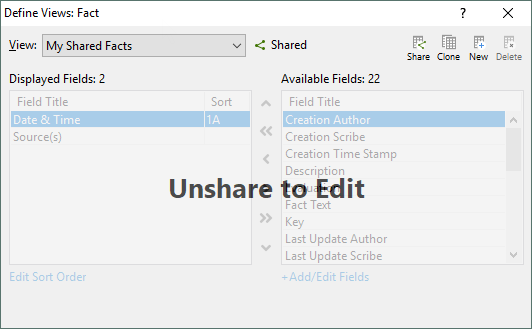
The Define Views dialog box prompts Unshare to Edit if a shared view is selected.
| 3. | Click Share.
The list of users you have shared this view with opens. |
| 4. | Select check boxes to add users. Clear check boxes to remove users. Users can be selected individually from the list or by group membership, as follows: |
| o | To select users individually, select their name in the list. |
| o | To select groups of users, click All Staff, All Authors, or All Scribes. |
| o | To exclude a user individually, clear the check box for the user. |
|
You can delete a view you have shared with other users.
| 1. | Select the spreadsheet type that has the shared view you want to delete. |
| 2. | Click View, click Current View, and then click Define Views.
The Define Views dialog box opens. |
| 3. | Click the View list, then select the shared view you want to delete. |
| 4. | Click Delete.
A message warns that other users will not be able to use the view anymore. |
| 5. | Click Yes.
The view is deleted. |
| 6. | Close the Define Views dialog box. |
|
| 1. | Close the case that has the view that has been shared with you, then re-open the case and sign in. |
| 2. | In the CASE SHORTCUTS list, select the spreadsheet that has the shared view associated with it. |
| 3. | On the View ribbon, click Current View and then select the shared view from the list. |
The shared view is loaded.
|