The Advanced Filter pane allows you to create filters and tags using all fields in a spreadsheet, including those hidden from view. Most filters benefit from combining filter criteria. Multi-level filters help you isolate information as you track and analyze case progress.
Example: (1) Linked Issue = Fraud AND (2) Status + = Undisputed.
The above example shows how you can create a fact filter composed of two filters. The results contain only undisputed fact records linked to the Fraud issue in the Facts spreadsheet.
In the New Filter pane, you will also find two additional filter selections that are bolded in the Filter Field/Area drop-down listing. What's New provides the ability for precise record updates filters that are limited to a day/week/month/three month timeframe. The All "Fact" Description Fields option limits the filter to only description fields in the Facts spreadsheet.

|
We recommend you take time to experiment with the filtering and tagging options available in the Advanced Filter pane to gain a deeper understanding of how to use these features to analyze case data. Doing so will not change or delete any case data. As you experiment, be sure to right-click on options to familiarize yourself with the shortcuts available.
|

|
Closing the Advanced Filter pane does not cancel any active filters or tag operations. Filters and tags remain active until you cancel them or close the case.
|
Reference the following table for a description on the Advanced Filter buttons.
|
Run the What's New filter regularly to ensure you are not missing any case updates, especially when case staff is entering and updating case records.
| 1. | In the Case Shortcuts pane, click the icon for the spreadsheet you want to use. |
| 2. | On the Editing menu of the Home tab, click Sort & Filter, and then click Advanced Filter. |

| 3. | In the New Filter pane, click What's New in the Filter Field/Area list. |
| 4. | In the Since field, type the date. |
All case records entered since the date specified will be included in the results.
| 5. | Select the Include Updated check box, if you want to include all records that have been updated since the date specified. |
| 6. | Click the Filter button  to initiate the filter. to initiate the filter. |
|
You can combine the What's New filter with other filters. For example, you could create a filter that identified new facts that are undisputed.
|
|
| 1. | In the Case Shortcuts pane, click the Facts icon to open the spreadsheet. |
| 2. | On the Editing menu of the Home tab, click Sort & Filter, and then click Advanced Filter. |
| 3. | In the New Filter pane, scroll to select the Date & Time field in the Filter Field/Area list. |

This field is the basis for your filter.
| 4. | In the Date section of this pane, click Dated in the first drop-down listing. |
| 5. | In the next drop-down listing, click the = Equal operator. |
| 6. | In the third field, type the date you want to locate. |
| 7. | Click the Filter button . |
Notice that only records that are equal to the date you entered now display in the Facts spreadsheet.
| 8. | To perform a new filter, click the Cancel Filter button . |
| 9. | Next search the Date & Time field with a Dated value of < Less/Equal and type in a specific date to filter. |
Notice that the fact records are filtered to only those dates that lead up to or are equal to the date you entered.
| 10. | To perform a new filter, click the Cancel Filter button  . . |
| 11. | Next search the Date & Time field for records that still need a date applied to them by selecting To Be Determined in the first drop-down listing. |
|
Filtering the Date & Time field by a given date allows you to review case events down to the seconds, as long as you are entering facts with a time stamp. In the Date & Time field, click on the Ellipsis button to open the Date Stamper. Select the Time tab and adjust the stamp settings to mark an event.
|
|
If many events occur on one day, try using a number in the Date & Time field to help sort facts in chronological order in the spreadsheet. This also helps if you don't have times to enter and need an order applied to the events. It is also a method to use if you don't want opposing counsel to know the time.
|
|
| 1. | In the Case Shortcuts pane, click the Facts icon to open the spreadsheet. |
| 2. | On the Editing menu of the Home tab, click Sort & Filter, and then click Advanced Filter. |
| 3. | In the New Filter pane, scroll to select the Date & Time field in the Filter Field/Area list. |

| 4. | In the Date section of this pane, click Dated in the first drop-down listing. |
| 5. | In the next drop-down listing, click the >= Greater/Equal operator. |
| 6. | In the third field, type the beginning date of the fact records you want to locate. |
| 7. | To initiate the search, click the Filter button . |
Notice that only records that are equal to the date you entered now display in the Facts spreadsheet.
| 8. | With the first filter still running, change the operator to <= Less/Equal in the listing. |

| 9. | In the third field, type the ending date of the fact records that you want to include in the search. |
| 10. | Click the Filter button . |
| 11. | In the Combining Two Filters dialog box, select Show me only the common elements (AND), then click OK. |

Notice that only records within the date range specified now display in the Facts spreadsheet and that the spreadsheet title bar is now updated with the combined search criteria.
| 12. | Click the Save button  , if you need to rerun this filter again in the future. , if you need to rerun this filter again in the future. |
| 13. | Click the Cancel Filter button to refresh the spreadsheet and run a new filter. |
|
| 1. | In the Case Shortcuts pane, click on the Documents icon in the All Shortcuts pane. |
| 2. | Scroll to locate the Description field. |
| 3. | Right-click in a blank Description cell for a record and click Filter by Selection, leaving the Selection field blank. |
| 4. | On the Editing menu, click Sort & Filter, and then click Advanced Filter to open the pane. |
Notice that only document records with blank description fields now display in the Documents spreadsheet.
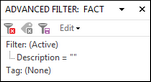
| 5. | In the Advanced Filter pane, click on the Description filter under Filter: (Active). |
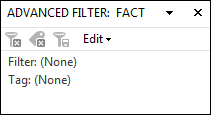
| 6. | Click the Edit and then click Not Equal. |
Notice that the Documents spreadsheet now displays only those document records that have text in the Description field.
| 7. | To return to viewing all documents without a description, click the Edit button and then select Equal. |
|
| 1. | In the Advanced Filter pane, click on the filter under Filter: (Active). |
| 2. | Click the Edit button and then click the new operator you want to use. |

Notice that the spreadsheet now displays only those records that meet the new filter criteria and that the spreadsheet title bar is updated.
|


