Staff must be added as users to a case before they can access it within CaseMap. New users can be added to a case at any time. There is no limit to the number of users a case can accommodate, though we suggest you keep user access limited to case staff to preserve the integrity of your case data.
Adding users to a case is an exclusive process, which locks all other users out of a case while this task is completed. Once users are added to the case, close the case and then re-open it so that others can logon.

|
For more information on how to create SQL cases and add users to SQL cases, refer to your CaseMap Server documentation.
|
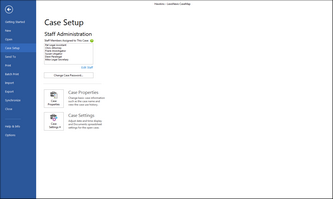
| 1. | Click the File tab, and then click Case Setup. |
|
Case Setup is disabled if a case is not open.
|
| 2. | Under Staff Administration, click Edit Staff to open the Staff dialog box. |

|
The Edit Staff link is disabled if you do not have permission to edit staff.
|
| 3. | In the Staff dialog box, click the Add Staff button  to add a new user. to add a new user. |
You can also right-click on the Staff Type drop down arrow and then select Add Staff.
| 4. | In the Full Name field, type in the name of the user. |
|
Click the Undo Staff Edit button  if you need to undo any entries. if you need to undo any entries.
|
| 5. | Press Tab to navigate to the next field. |
Notice that CaseMap automatically created a short name and initials for the new staff member. You can modify these default entries, if needed.
| 6. | In the Staff Type field, click on the type (author or scribe) for this user. |
| 7. | In the Org. Name field, type in the organization that represents this user. |
| 8. | Scroll to the right and verify that the user is now designated as active and that the Creation Time field is stamped. |
| 9. | Click the Refresh Staff Table button  . . |
| 10. | In the message box, click Yes to have CaseMap set up spreadsheet views for the new user. |
| 11. | In the New Views and Filters box, select the user you want to use as a template for the new user's views, then click OK. |
A status box displays as CaseMap updates the user permissions.
| 12. | In the message box, click OK. |
The new user is added to the case and the initial log on password is set to blank. New users can set passwords when they log into the case in CaseMap, or by clicking Change Password on the Tools menu.
|
The Change Password button is disabled if you are logged into CaseMap Server via Active Directory, or if you do not have permission to change passwords..
|
| 13. | In the Staff dialog box, click Close when all new users are added to the case. |
| 14. | On the File menu, click Close to exit the case and re-open it. |
|

