| 1. | Double-click on the CM11Setup.exe icon to launch the CaseMap Install utility. |
| 2. | When the InstallShield Wizard launches, click Next. |

| 3. | In the License Agreement dialog box, click Yes. |

Click Print if you want to print a copy of the license agreement.
| 4. | In the Information dialog box, review the installation information, then click Next. |

| 5. | In the Default CaseMap Server dialog box, type in the CaseMap Server in the Name field. |
This dialog box only displays if you are installing CaseMap Server.

In the URL field, type in the name of the server URL, then click Next.
| 6. | In the CaseMap Microsoft Office Plug-ins dialog box, select the the check for each plug-in you want to install: Microsoft Word and Microsoft Office. |

Microsoft Office plug-ins allow case users to send data from Word or Outlook to a case.
Clear the check box for a plug-in you do not want installed.
| 7. | In the Choose Destination Location dialog box, verify whether the default destination folder is the appropriate location, then click Next. |

The default folder is C:\Program Files\CaseSoft\CaseMap 11.
| 7. | In the Start Copying Files dialog box, review the current settings, then click Next. |

Please wait while the new software is being configured.
| 8. | In the InstallShield Wizard Complete dialog box, select the Yes, I launch LexisNexis CaseMap 10 now check box. |

| 9. | Optional: Select the Yes, I want to view the read me file now check box, if you want to do so at this time. |
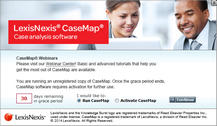
| 11. | In the Welcome to CaseMap dialog box, select Activate CaseMap. |

| 12. | In the CaseMap 11 Software Activation dialog box, click Next to open the Enter your registration information dialog box. |

| 13. | In the Registration Name field, type in your user name for license registration. |
| 14. | In the Registration ID field, type in your registration ID. |
| 15. | In the Product ID field, type in the CaseMap license number. |

|
You must be registered with LexisNexis as a valid user of this software to have this registration information. When you register with LexisNexis, you should receive this information via email or phone.
|
| 16. | Click Next to continue. |
| 17. | In the Read the LexisNexis License Agreement dialog box, read the license agreement and then select the Yes, I will abide by the LexisNexis License Agreement check box. |

| 18. | Click Next to continue. |
| 19. | In the How do you want to activate this product dialog box, select the activation option you want to use. |

| • | Activate software online — Use this option to activate online with an active internet connection. |
| • | Activate by web browser or phone — Use this option if you received an activation key via email. |
| 20. | Click Next to continue. |
| 21. | In the Summary of online activation transmission information dialog box, review the license registration information. |
| 23. | In the message box confirming CaseMap activation, click OK. |

Installation is complete. CaseMap now automatically launches and you can begin using it.
|


