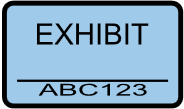
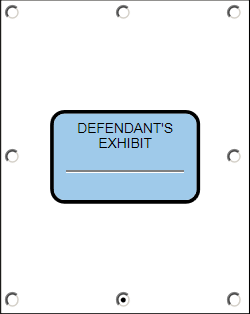
You can apply stamps to the exhibits that you select. Stamps may be configured with color and may include a page name, exhibit number, trial number, or Bates number. You can also add a case number of up to 25 characters. You can select where on the page margin to apply the stamps.
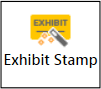
FILE > Exhibit Stamp
After you have applied the stamps, you can move, resize, or delete them individually via the exhibit viewer or from within the presentation window. Stamps are applied to Layer 1 so they cannot be hidden when presenting the exhibits. As with other annotations, exhibit stamps do not appear on exhibit printouts. However, exhibits stamps can be made to appear on exported exhibits. For more information on exporting exhibits see: Exporting Exhibits, Media Clips, and Playlists.
| 1. | In the Info area of the FILE tab, click Exhibit Stamp. |
| 2. | In the Welcome dialog box, click Next. |
The exhibit selection dialog box opens.
| 3. | Select items to stamp using the following options. |
| • | Click Add All to add all the listed exhibits. |
| • | Select individual exhibits and then click Add Selected. |
| • | Double-click individual exhibits. |
| • | After adding exhibits, you can remove them from the queue as needed. To remove one or more exhibits, CTRL+click or SHIFT+click items and then click Remove Selected. To remove all exhibits, click Remove All. |
The exhibits to be stamped are listed in the right panel of the dialog box.
| 5. | Select options as needed: |
| • | Stamp type. This determines the title and color of the stamp. |

| • | Field. The following fields are available: page name, exhibit number, trial number, or Bates number. |
| • | Case Number. You can enter up to 25 characters in this field. |
| • | Placement. Select a radio button to position stamp on the page. |
The default placement is bottom edge of page, centered.
| • | Click Apply Exhibit Stamp to the first page only to have the stamp applied that manner. |
| 6. | When options have been selected, click Next. |
The Ready dialog box opens.
| 7. | Review your selections and then click Next. |
The exhibits are applied and the Exhibit Stamp Wizard Complete dialog box opens.
|
| • | Open the exhibit in the presentation window or exhibit viewer and then do one of the following: |
| • | To move the stamp. drag the stamp to a different part of the page. |
| • | To resize the stamp, select the stamp and then click and drag the exhibit stamp handles. |
| • | To delete a stamp, select it and then press the DELETE key. |
|
