A preferred media path is a folder location on your computer that is registered in a Sanction case. Sanction uses these paths to find media, the video for synchronized transcripts, and playlists.
By default, the Media folder within the case folder on the computer's file system is registered as a path.
When you import media, a new preferred media path is added to your case, which points to source folder for the media. Also, during the import process, you can optionally specify that all subfolders be added as preferred media paths.
Sanction will also register a preferred media path to the Transcripts folder if you import a synchronized transcript to the Transcripts folder. These paths are editable.
Note that merely copying media files to a preferred media path folder does not make them immediately visible from within the case. For a case to be visible, it must be imported. For more information on importing media, see: Importing Media.
You can manually add, edit or delete preferred media paths by doing any of the following:
| • | On the FILE tab, click Info, and then click Media Paths. |
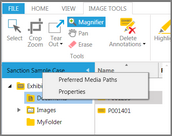
| • | In the main program window, at the top of the folder list, right-click the case name and then click Preferred Media Paths. |
| • | When importing transcripts, as of the last steps in the transcript import wizard, you can open the preferred media paths dialog box. You would normally use this method if the video for a synchronized transcript was kept in a folder other than the Transcripts folder. |
Note the following considerations:
| • | If you move media to a folder location that is not registered as a preferred media path, you must add a preferred media path to the new media location. For more information on moving cases and media see: Moving Cases and Media Files. |

|
If you receive this error message: Media File Not Found, it means that a preferred media path has not been established to the media you are attempting to play. This condition can be the result of importing a synchronized transcript without also having established a media path to the video portion of the transcript.
To rectify this situation, you can do any of the following:
| • | Use the Media Import Wizard to re-import the audio or video. For more information, see: Importing Media. |
| • | Copy the media file to the Media folder in the case folder on the Windows file system. You can determine the folder location on the Windows file system. To do so, on the FILE tab, click Info. The folder path is provided in the Case Directory field. |
| • | Manually establish a preferred media path to the media file, which is described in this topic. |
|
| 1. | Open the case that you want to change the path for. |
| 2. | Do either of the following: |
| • | Select the FILE tab, click Case Media Paths, and then click Add. |

| • | Select the HOME tab, in the task column heading, right-click the case name, and then click Preferred Media Paths. |
You are returned to the Case Properties dialog box.
|
| 2. | Do either of the following: |
| • | Select the FILE tab, click Case Media Paths, and then click Add. |
| • | Select the HOME tab, in the task column heading, right-click the case name, and then click Preferred Media Paths. |
| o | |
| 3. | Select a media path and then click Move Up or Move Down as needed to reposition it in the list. Repeat this step with any other media path that you want to reposition. |
|
| 1. | Start the process of importing transcripts into your case by doing either of the following: |
| • | On the FILE tab, in the Info area, click Import, and then click Transcripts. |
| • | On the HOME tab, click Import, and then click Transcripts. |
| 2. | Proceed with running the wizard to import transcripts, until the Import Confirmation step. |
| 3. | In the Import Confirmation dialog box, click Select Media Paths. |
| 4. | Click Add, and then click the folder that has media for your case in it. |
Select Include Subfolders if you want Sanction to find media in any folders within the folder you selected.
|

