If you need to create many individual clips from the same synchronized transcript, using a clip list can save you time when compared to typing each clip individually into the Quick Clip field of the media player.
A clip list is a plain text file that contains a list of the clips that you want to create from a synchronized transcript. You can create a clip list by using any text editor, such as Notepad. After you create a clip list file, you can use Sanction to import it, which will create the clips.
You can also export clip lists to a csv file via the Clip List Export Wizard.
| 1. | Read over the transcript to identify the page and line numbers where you want each clip to start and end. |
| 2. | Open a plain text editor, such as Notepad. |
| 3. | For each clip you want to create, type the page and line number for the start of the clip followed by the page and line number for the end of the clip, using the following format: |
Pg:Ln-Pg:Ln
For example, the following would create 2 individual clips:
4:14-4:17
5:2-6:20
The first clip would start on page 4, line 14 and end on page 4, line 17. The second clip would start on page 5, line 2, and end on page 6, line 20.
| 4. | After each page and line range add a hard return. |
| 6. | Use Sanction to import the file. The import process is described in the next procedure of this topic. |

|
Any of following formats may be used to designate ranges for individual clips:
Pg.Ln+Pg.Ln
Pg:Ln+Pn:Ln
Pg.Ln-Pg.Ln
Pg:Ln-Pg:Ln
|
|
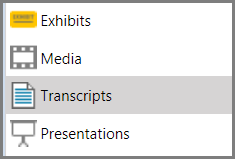
| 1. | On the HOME tab, click the Transcripts navigation bar. |
| 2. | Click the synchronized transcript that you want to create the clips for. |
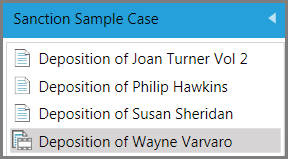
Synchronized transcripts are marked with a film frame icon
| 3. | On the HOME tab, click Import, and then click Clip List. |
The Welcome to the Clip List Import Wizard dialog box opens.
The Select Clip List File to Import dialog box opens.
| 3. | Navigate to the clip list file, select it, and then click Open. |
The clips are listed in the Select Clip List to Import dialog box.
The Import Confirmation dialog box opens.
The clips are created for the synchronized transcript and ready to use.
|
|
You can share your work with your team by exporting a clip list to a csv file.
| 1. | On the HOME tab, click the Transcripts navigation bar. |
| 2. | Select the synchronized transcript from the transcript list. |
| 3. | On the HOME tab, click Export. |
| 5. | The Clip list Export Wizard dialog box opens, click Next. |
| 6. | Click the folder that contains the video or audio clips that you want to export. |
| 7. | Do either of the following, depending on what you want to export: |
| • | Click Add All to add all the listed items. |
| • | Select individual files or folders and then click Add Selected. |
| • | After adding items, you can remove them as needed from the queue. To remove one or more items, CTRL+click or SHIFT+click items and then click Remove Selected. To remove all items, click Remove All. |
Items that are ready to be exported and are listed in the right panel of the dialog box.
The Select the Destination file dialog box opens.
| 9. | Click the Browse button to navigate to the location where you want the clip list(s) saved. |
| 10. | Type the file name, click Save and then click Next. |
The default destination is now set for your clip list(s).
| 11. | In the Ready to Export dialog box, verify your clip list selections before exporting and then click Next. |
The clip lists are exported to the destination folder.
| 12. | The Export Confirmation dialog box appears to confirm the number of clips successfully imported. Click Close to close the wizard. |
|
