You can replace an existing exhibit with a different version of it. When replacing an exhibit, the replacement must be of the same file type as the original and must have the same number of pages.
You can also add pages to an exhibit or replace pages. When you add pages, the replacement pages must be the same file type as the original. Any annotations that you applied to the original page are transferred to the replacement.
| 1. | Navigate to the exhibit you want to change. |
| a. | On the HOME tab, click the Exhibits navigation bar. |
| b. | Open the exhibit folder that contains the exhibit. |
| 2. | Do either of the following: |
| • | Click the exhibit, and then on the HOME tab, click Update Exhibit, and then click Add Page(s). |
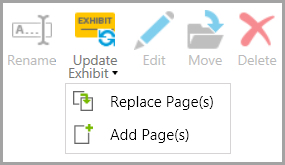
| • | Right-click the exhibit, click Update Exhibit, and then click Add Page(s). |
| 3. | Navigate to the file that contains the exhibit pages you want to add. |
| 4. | Select the file and then click Open. |
In the Exhibit Viewer, the pages in the file that you selected are added to the end of the page list.
|
| 1. | Navigate to the exhibit you want to change. |
| a. | On the HOME tab, click the Exhibits navigation bar. |
| b. | Open the exhibit folder that contains the exhibit. |
| 2. | Select the exhibit, and then on the HOME tab, click Update Exhibit. |
| 4. | In the message box that says that all the images for the exhibit will be updated, click OK. |
| 5. | Navigate to the file that contains the exhibit pages you want to add. |
| 6. | Select the file and then click Open. |
The exhibit pages are updated with the pages of the exhibit you selected.
|
