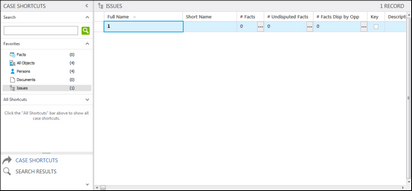
When you first create an issues outline in the Issues spreadsheet, you can choose to enter all primary issues first and add sub-level issues later. Or you can enter them all at one time. It's easy to insert a new record or reorganize issues and sublevel issues in the spreadsheet.

2. | On the Home ribbon, click the New Record button, and then click Issue. |
A blank issues record automatically displays in the spreadsheet for you to start entering data.

3. | In the Full Name cell, type in the full name of the first issue. |
4. | Press Tab to navigate to the next cell. |
Notice how the Short Name cell automatically fills in for you.
5. | Optional: Click the New Record button and click Issue. |
You can also press the Insert key to add a new record.
6. | Continue entering all primary level issues in this manner. |
Record data is automatically saved as you navigate to a new cell or record.
|
1. | In the Issues spreadsheet, highlight the primary issue for which you want to add sub-level issues. |
2. | Click the New Record button and click Issue. |
You can also press the Insert key to add a new record.
3. | In the Full Name cell, type in the full name of the sub-level issue. |
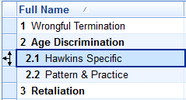
4. | Click on the arrow pointing to the right to make this record a sub-level issue. |

Notice that the arrow highlights in red to indicate which direction you are moving the record within the spreadsheet.
The sub-level issue is now indented and follows a secondary outline numbering scheme, and the Short Name cell is automatically filled in.
5. | Continue entering all sub-level issues in this manner. |
Record data is automatically saved as you navigate to a new cell or record.
|
After you create your initial issue outline, you can link issues using the Issue Linking pane, which is accessible from each spreadsheet. If data is imported from other applications using the Send To feature in CaseMap, you can link content to data using the Issue Linker pane in the Send To CaseMap utility.

|
# Fields all display zeros until issues are linked with other case elements (facts, objects, questions, research).
|
1. | On the Home ribbon, click Issue Linking to open the Issue Linking pane. |

|
Click on another spreadsheet type (e.g., Documents) under Favorites on the Navigation pane if the Issue Linking button on Home ribbon is not active.
|
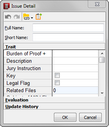
2. | In the Issue Linking pane, click Add a new Issue to open the Issue Detail box. |

3. | In the Full Name field, type the full name of the new issue. |
Notice how the Short Name field automatically fills in for you.
5. | Click OK to save the issue. |
The new issue now displays in the Issue Linking pane under Linked Issues, and at the bottom of the issues list in the Issues spreadsheet.
6. | In the Navigation pane, click Issues, under the Favorites heading. |

|
If you need to move this issue in the outline or make it a sub-level issue, you need to do so in the Issues spreadsheet.
|
|
1. | In the Issues spreadsheet, click on the issue you want to move. |
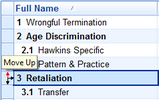
2. | Click on the arrow point (Move Up, Demote, or Move Down) in the direction you want to move the issue. |

Notice that the arrow highlights in red to indicate which direction you are moving the record within the spreadsheet.
3. | Click on the arrow point until the issue moves to the location you want it in the spreadsheet. |
|
1. | In the Issues spreadsheet, click to select the issue record you want to delete. |
2. | Click the Delete Record button on the Standard toolbar. |
The issue record is now permanently deleted from the case.

|
When you delete an issue record, you also delete links between the issue and any associated case elements. Be sure to make note of any linked records prior to deleting an issue, if you want to track that information for reference purposes.
|
|